A standing desk has a lot of advantage which has been spelled out multiple times by specialist. Changing from the traditional desk and chair in your workplace can be described as a life-changing decision. Other than the cost incurred in the process, there is also the mental fortification required to go through with it as you may not enjoy standing up all the time. However, if all conditions are met, there are numerous advantages to be enjoyed from investing in a standing desk.
Standing desks can be expensive to purchase. Some products cost as much as $1000 and even more. One of the most important factors in do-it-yourself projects is to find a way to minimize such costs so that for as low as $300 or even less you can own a standing desk fitted to your specifications for your comfort. There is also the mental satisfaction experienced after the completion of a DIY project.
Building a standing desk for the office on your own
The aim of a standing desk provide the user the opportunity to do their work in a comfortable standing position and as such, measurement of height, elbow level, and eye-line is important. A standing desk is meant to maintain a good posture and sometimes correct existing deformation in the user’s posture. We don’t want our standing desk to be the cause of our bad posture so those measurements mentioned earlier are critical to the success of the project.
After taking measurements there is two major approaches that had been identified in building Your Own standing desk. The first method entails the conversion of preexisting furniture you have around or access to into a standing desk. Now, this may not look so pretty but it meets the demand for a Standing table and accomplishes the task with the least cost incurred in the process. If we take a look around our offices, garages, etc, we are bound to find some piece of furniture that can be stacked upon one another with some modification where needed, and voila, we have a standing desk. Let’s take a look at some examples.
You can simply place your current work table on another shorter study table with the same width span. A coffee table can be used to raise the height of your existing work desk. Adjusting your workstation, desktop, or laptop into a favorable position can be achieved by attacking books under the device. The initial work table can also be raised with the use of carjacks as well as stacks of books to meet the requirements of the user. If you do this, you have to be extremely cautious as a jolt to the jacks can send the entire structure flying In multiple directions which we do not want. Except for the slightly unstable structure, we now have a standing desk with literally almost no cost. This can be used to determine whether we are comfortable with the use of a standing desk before moving to purchase a more solid structure which may be capital intensive. Another advantage of this is that more workspace is created as two pieces of furniture have been converted into one so you can now hook up that mini basketball hoop over your waste bin.
Putting together some very affordable parts is a very popular and cheap method to convert traditional desks to standing ones. An existing example of this method originates from Colin Nederkoom which he calls the standesk 2200. Your modified standing desk will now consist of the lack side table, Viktor shelf and the Ekby Valter bracket. The cost of all these parts is about $22 before the task. After the acquisition of the parts, assemble the table, bolt the shelf into the legs using the wall brackets and sit your desk on it. You should note that the height of the shelf is adjustable but the side table is fixed. To manually adjust this, you can stack notebooks or wood underneath the legs to increase the heights. To reduce the height, just saw the legs into appropriate measurements. This structure once built may not be easily dissembled and is near impossible to store away when not in use. You may also purchase an adjustable lap desk which works very similar to the IKEA hack method, but you can adjust the height as well as the angle of your workstation. This method allows the structure to easily shore away when not in use. Although with this method you may not be able to raise your desktop without stacks of books. At about $36-$60 bucks, it is easily the cheapest method of commercial conversion into standing desks method and far cheaper than dedicated standing desks. It is also very portable so it can be packed for trips.
The second method to a DIY a standing desk for the office entails building the desk from scratch with cheap and affordable materials. The first step in building standing desks is to source the raw material that would be used for the construction process. All that is needed is a few basic materials such as a good frame like Fezibo or Topsky, a tabletop piece, wood, or pipes to serve as the legs of the desk. Tape for taken measurement, tools for mounting and adjusting. A hand-held saw to cut the piece into the required dimension will be needed as well.

Things you will need for DIY standing desk
- Flat platform to serve as a desktop
- Sturdy material for the base – (DIY standing desk with a strong frame is recommended)
- Screws, bolts, and other requirements for joints
- Adjustable joint clamps if required
- Measuring tape
- Saw, hammer, and a screw driver
- Pencil.
After getting all these, it’s just a matter of putting the piece together at the right angles and dimensions. Many DIY desk builders recommend starting with certain pieces like the Gerton table or Viktor shelf from IKES, then fitting them with customized legs individually. With the right base components available, you can put together a standing desk that is made especially with your dimensions and needs for a little amount of money.
With the right base component in hand and at the right specification which can be modified incase the materials did not arrive in the correct or required dimension. Wooden posts can be sawed to the exact size needed, and are easiest to work with. If you choose to use metal pipes, double-check their length and width and ensure they meet the required specification before purchase. A person of average height (5:11 inches) will most likely be more comfortable with the base at about 3:4inches tall.
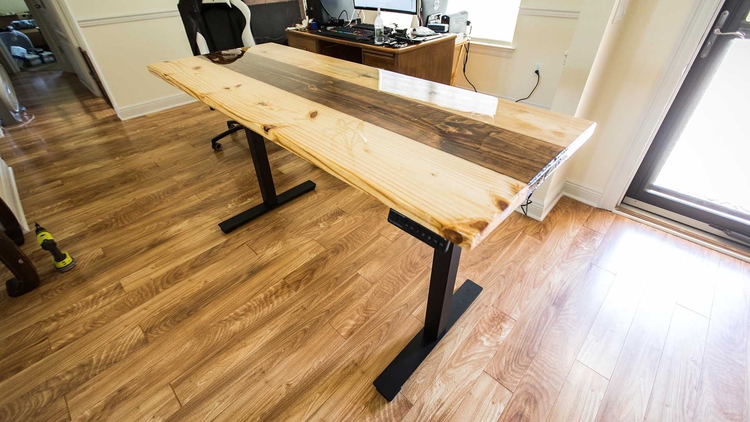
Attach the legs to the desktop after ensuring all measurements are correct. Make the base fairly wide and sturdy to serve as a strong foundation to enable the desk stand without wobbling and leaning. Use wood screws to secure wooden legs to a wooden desktop while metal legs should be bolted down. Ensure to test the sturdiness of your desk before you start placing things on it.
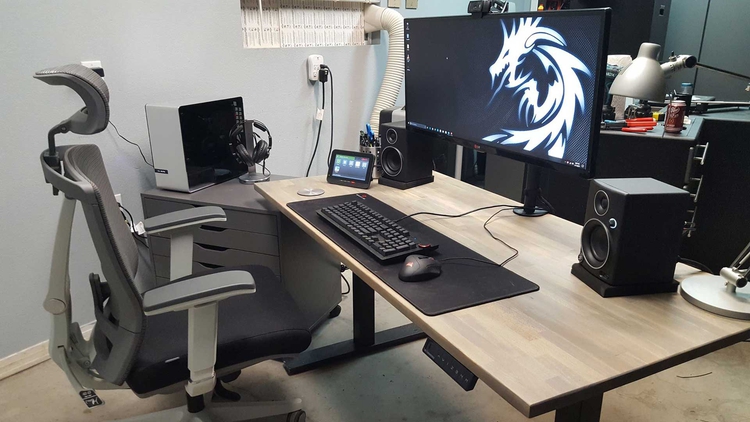
For maximum efficiency of your desktop, you can add clamping joints to the desk legs, this will enable you to control the height of the desk which can then be adjusted to serve at various points for use. If done properly, you will be in possession of one desk that serves as both sitting and standing desk in your workspace. An adjustable desk will be made out of telescoping legs. These legs can be made out of pipes with different diameters which enable them slide into one another upon adjustments. This desk makes it very easy to heed to physicians advice to split time between siting and standing during work.
A standing desk can also be improvised from existing furniture. The aim of a standing desk is to permit the user work comfortably in a standing position. You can simply place a box or some other platform under your existing desk to serve as a lift to enable you work in a standing position. This may not look pretty but its efficiency and relative low or no cost can serve as an advantage. Be sure the platform you use as lift are sturdy enough to hold the desk as valuable equipment’s such as computers may be placed on the desk. Also ensure this to prevent office injuries and accident.
A standing desk can also be mounted on the wall effortlessly. Just look for a wall and attach the desktop with sturdy bolts for support. You can store office equipment’s under the area where you attached the desktop to the wall when not in use. A well-mounted desktop can also serve as a wall shelf where books and flowerpots as well as other accessories ca be placed.
After the completion of your DIY standing desk, it is important to engage with your standing desk in an appropriate manner. Ensure you don’t lean too much on your desk. Also learn to alternate between sitting and standing. The use of comfort mats also be proven to reduce the effects of standing for extensive periods as it helps ease blood flow.
")


")


 for a heavy person")


